Computer-Controlled Machining//
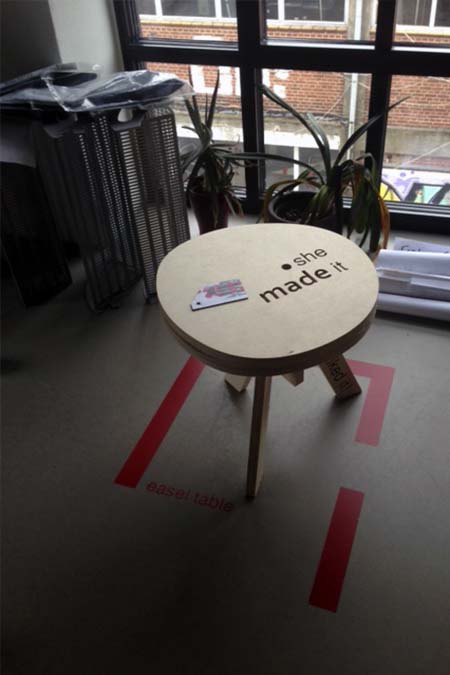
Design of a non-round table
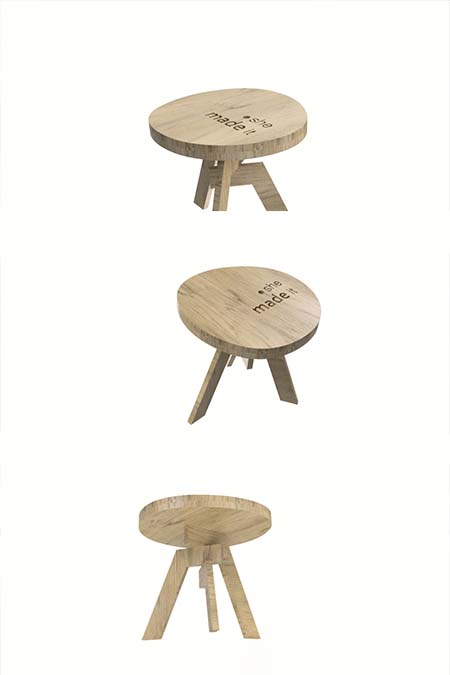
The idea was to design something big by using the CNC milling mashine. For this purpose a 45 cm diameter table was designed. This table aim to break the symmetry of the circle and to communicate not only by lines but also through text on the horizontal plane and on one of the legs also. Three legs , of different height will be placed on top of each other like a primitive tripod and the bigger leg will press fit inside the first layer of the tale plane. The final plane will be engraved with a typography message and will be glued to the base plane. The engraved letter will be filled with colorful silicon.
V-carve 1.
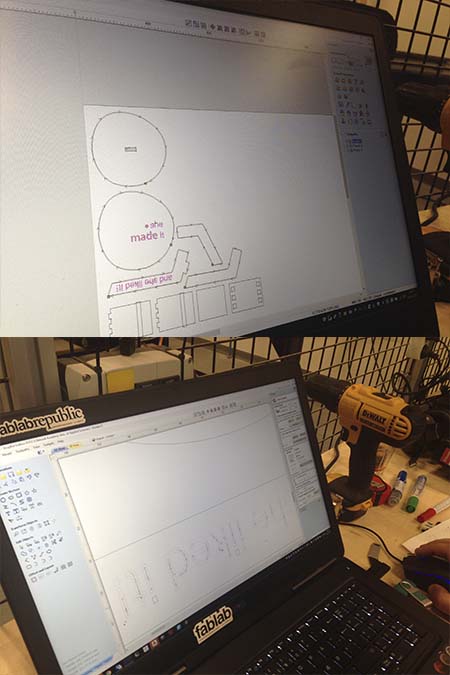
The next step was to import the pdf file to the v-carve software. The layout that was set was the layout of the plywood plate. The plans were placed very close to each other in order to save material and energy and the dimentions of the material were checked strictly (x,y,especially z) since the choice of the bit is based (also) on the height of the plywood plate. Since the design consists of two different paths (a cutting one and an engraved one) the next step was not inform the software which line should cut and which one should engrave.
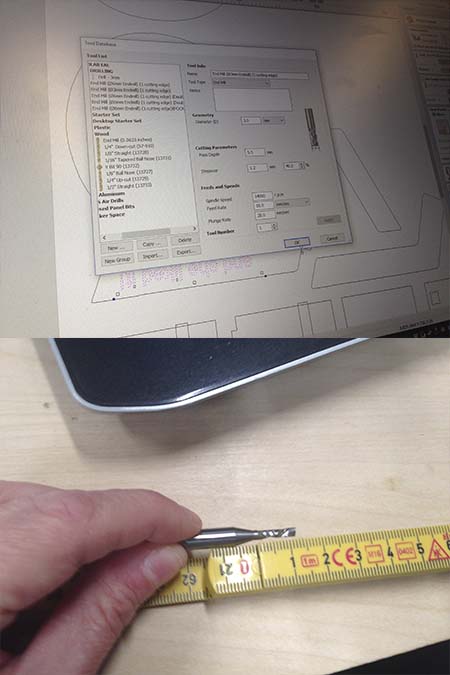
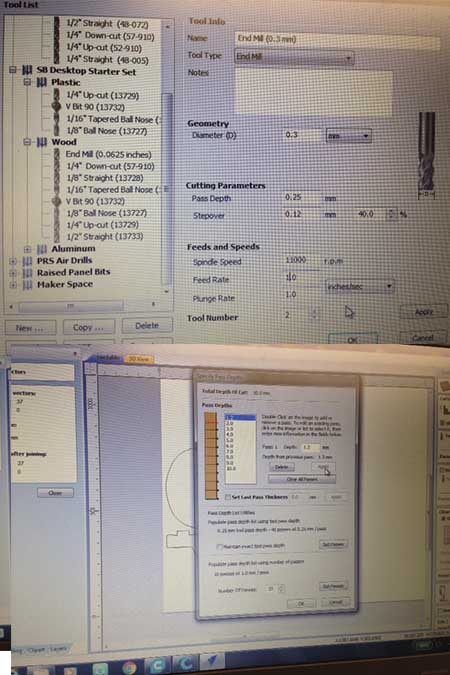
Selecting the right bit for engraving
The bit that was chosen was a 1,2 cm bit since i wanted a pocket of 1 cm. The height of the bit should never bit the same of bigger that the engraved depth since there is danger of fire when the part of the bit that do not have the little channels will mill the wood. The diameter was 3mm and the speed was set lower than the cutting speed.The rest of the characteristics are shown on the picture.
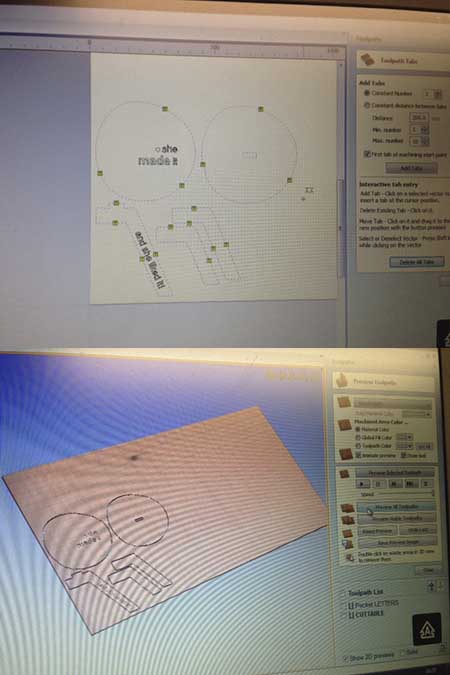
Axis and engraving paths
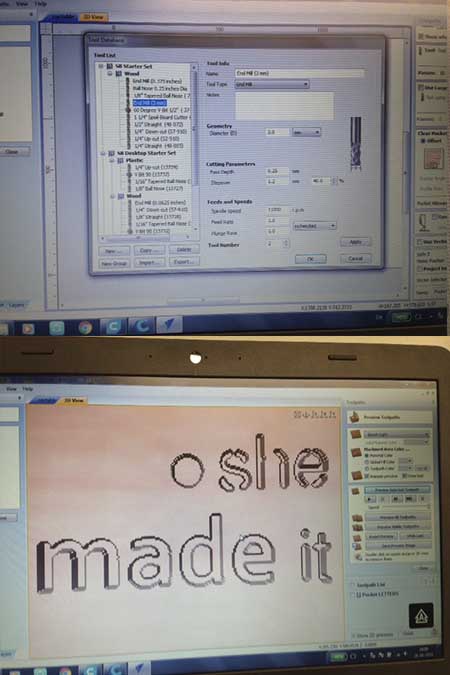
The x,y,z axis was set and checked, the right bit took place and the operating button was pressed. It is remarkable to add that all the paths inside the letters were checked before since the diameter of some letters were smaller thst the diameter of the bit. In that case the letters were rescaled until all the paths were clear.
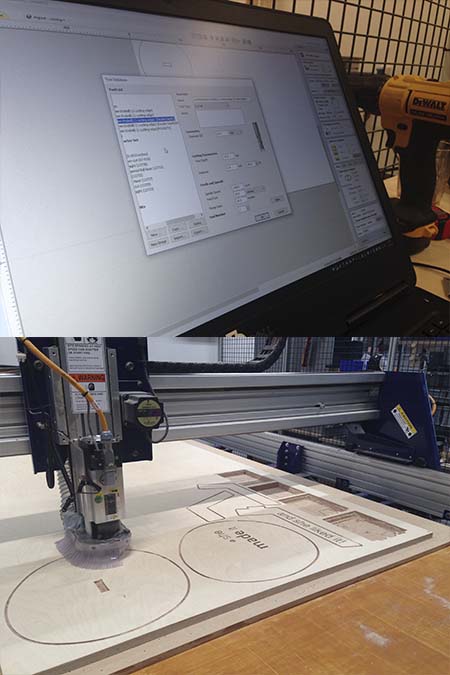
Cutting paths
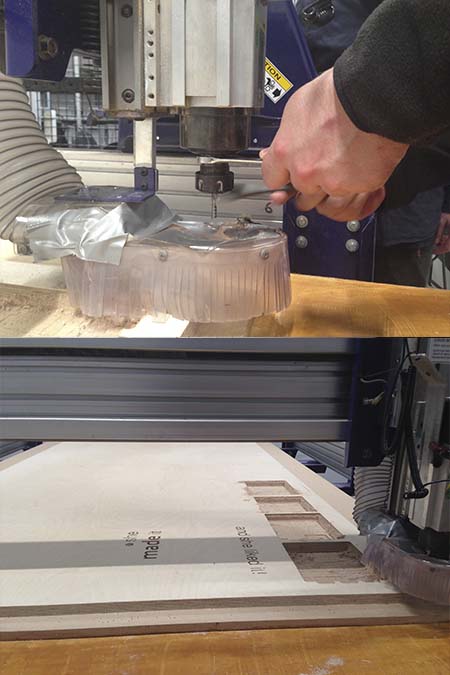
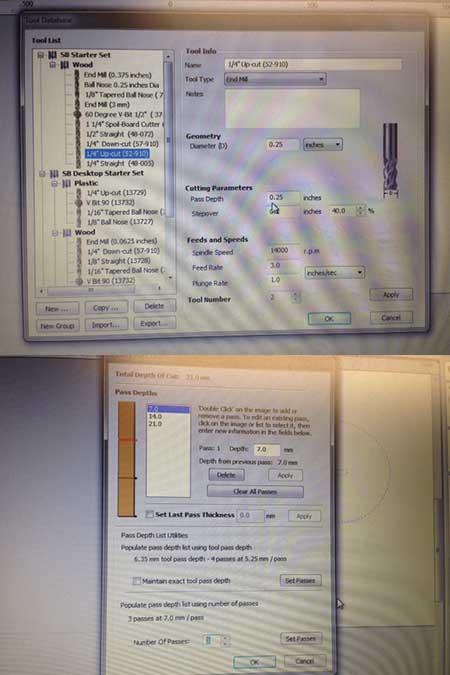
The next step after engraving was to cut all the table parts. The bit that was used was a 6mm diameter bit with 2 cm height, but since the plywood that was used was 21mm deep the cutting procedure were set to two times with a pretty much slow speed in oreder to avoid the overhitting of the bit. The bit was changed an replaced carefully and a new z axis was set, since was changed from the replacement od the second bit. The x, y axis remained the same and before the operating button the bit was send to the 0,0 initial point.
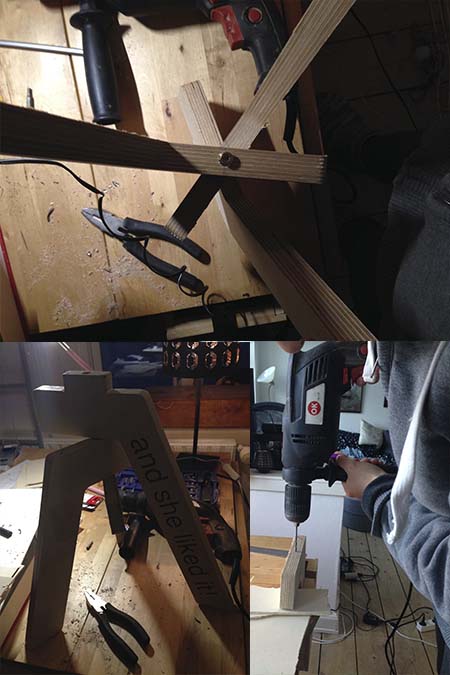
Mounting the table
Apart from the parts of the table that was pressed fit between them, the three legs should mount together with screws into a common axis with 120 degrees of turn. One canal per leg was opened by using the driller machine. The first bit to try was a thin one and the nexts ones were of bigger diameter in order to open the canal pece by piece and to avoid the danger of fire. Three different screws with bits were placed in the three canals, which was placed exactly the one after the other. In order to avoid the rotation of the legs a second smaller bit(withput a pin) was placed next to the canals. The result because of good geometry and carefully mounting was a stale table base.>
My easel table
Layout set up
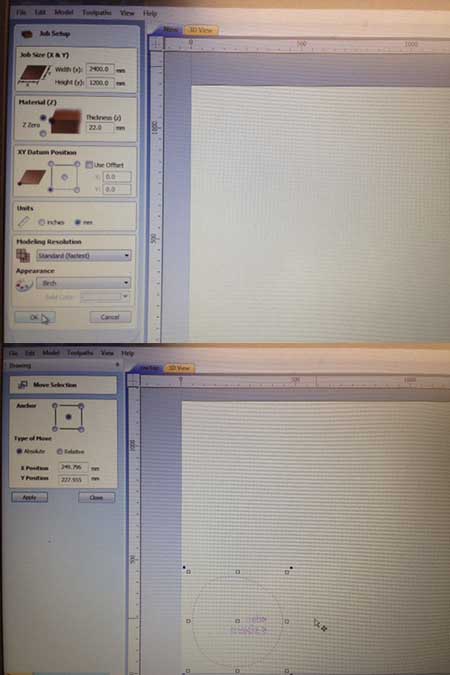
This part of the documentation is happening two months after the milling of the easel table. The reason for this is the fire we had in our cnc room and the fact that in order to finish our weekly tasks we all had to mill our project in another fablab. As a result, the job was done but a piece of the documantetion was missing. Nevertheless, i decided t run again my design in V-carve exactly in the way that i run it two months ago. In the following pictures are highlighting steps that i believe that they were not well documented before. The first step is to set the wooden plate and the x,y,z(plate width).I set once again my z on the top of the wooden plate.
Bit choice for the pocket
Here was used exactly the same bit that i documented on the line above. An important part was to set how deep it will go anytime that it runs and how many turns will do. I set it on depth 1,25 mm per time and 10 passes.
Pocket form
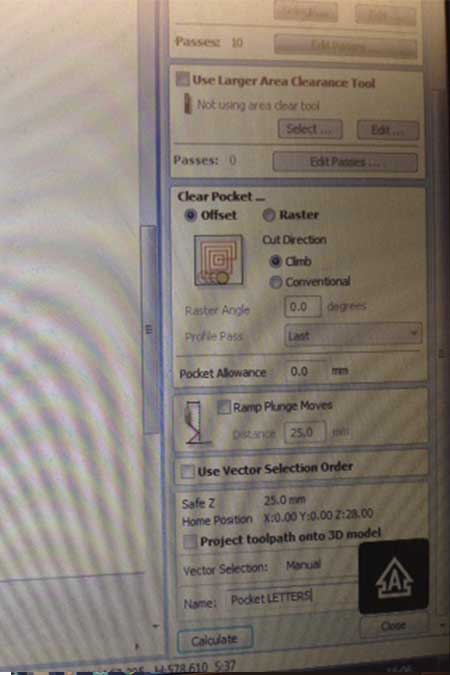
In this step i chose the form of the pocket.I used the offset choice.
Pocket simulation
When everyhting was set i run a simulation to check if it was the result that i wanted.
Bit choice for the cutting part
This step i believe that is well documented in the step above. What i wanted to add is the spindle speed 1400 and the pass depth 0,25 inches.I set also the depth 7 mm and the number of passes 3.
Cutting simulation
As on the step above i run a simulation to check if the bit is gonna cut through. The result was as i wanted. Before the simulation i added a couple of tabs so my design stays stable while cutting. I did it manually cause i wanted to control the shape according to its geometry.
HOW I PREPARED A FILE FOR CNC MILLING//Step 1_open v-carve and getfamiliar with the softwares's environment. Step 2_ set the job width and height. the x.y of your wooden plate's layout.. Step 3_Set the thickness of the material, in other words set the z of your job.In my case i used a 2.2 mm plywood and i set the z on the top of the plate and not at the bottom. Step 3_ here we can set the rest of the parameters like the units,the appearence the 3d simulation , the position of the x,y and the materials. It reaaly differs from job to job.I used a plywood, in inches and i set my starting point in the right corner ot the plate. Step 4_ Next step is the file operation section and here is where we inesrt our 2d drawing. The 2d drawing could be designed in every 2d program. In my case i used illustrator.Apart from inserting the job V-carve gives you also the possibility to draw directly on the layout. You can create vectors, transform objects and edit them. In my case i inserted my file and then i added the text i wanted to ingrave on the table and on one opf the table's legs. I used the text icon and i enterred my text and preferences. Step 5_ Here is the most important step of the v-carve software. Is where we set the toolpaths. In other words, what kind of tools you are going to use for which kind of opperation , which speed etc. V-carve's environment is easy to use and small icons indicate which operation will be set. In my case i had to use cuts, and pockets for the letters. The intinila idea was to engrave them but after the advice of my instructor, Lorenzo, i decided to create a deep pocket and fill them after with raisin. The first thing i did was to set the cutting depth in inches and to tell if is a downcut or an upcut. In my case was a upcut for both jobs. The next step was to set my tools.The bit that was chosen was a 1,2 cm bit since i wanted a pocket of 1 cm. The height of the bit should never bit the same of bigger that the engraved depth since there is danger of fire when the part of the bit that do not have the little channels will mill the wood. The diameter was 3mm and the speed was set lower than the cutting speed. Step 6_ The next step after creating the pocket was to cut all the table parts. The bit that was used was a 6mm diameter bit with 2 cm height, but since the plywood that was used was 21mm deep the cutting procedure were set to two times with a pretty much slow speed in oreder to avoid the overhitting of the bit. The bit was changed an replaced carefully and a new z axis was set, since was changed from the replacement od the second bit. The x, y axis remained the same and before the operating button the bit was send to the 0,0 initial point. Step 7_ here is your table!!!!Use sandpaper and then just mount it.
Conclusions//
Vcarve is the most important step of this week. The selection of the bits and the right settings can give you a result in a very short time. Finally, is not a good idea to use the cnc milling mashine alone. Is the most dangerous mashine of fab academy and mistakes can be done easily.
Links//
Shopbot cnc milling machine, Fab lab Odense, special thanks to all of them there who helped us this week , Vcarve software